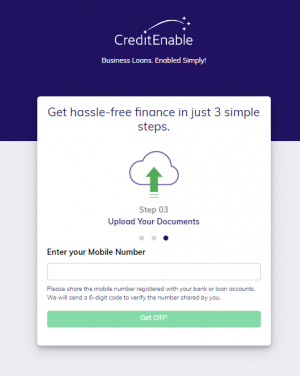
Once you’ve scanned all your business documents and gotten your bank account e-Statements for the last 12 months, uploading them to the CreditEnable Documents Portal is very simple.
After you’ve passed our eligibility check, you are directly taken to the document upload page. We recommend uploading all your documents within 24 hours of completing your eligibility check because the sooner we get all your documents, the faster we can assess them and match you with a lender and product. Once we receive all your documents, we send your full application package to the matched lender partner to be approved. A full application package can get you your business loan in as little as 3 days!
You are also able to leave the app, get your document in order, and log back in when your documents are ready to upload.
- Visit https://apply.creditenable.com/
- Log in with the same phone number you used before
- Enter the new OTP sent to your phone
- You’ll start back right where you left off!
Things to Remember
All the information you entered before has been saved, so you don’t have to fill out the application again!
Our Portal accepts image files (JPG and PNG), PDFs and Zip Files.
When uploading your bank statements for the last 12 months, remember that lenders only accept e-Statement PDFs as received or downloaded from your bank account. Learn how to access your e-Statements digitally, here.
If you’re using an Android or an iPhone to upload your documents, you can also use your camera feature to directly take photos of all other documents (excluding your bank account e-Statements PDFs) and upload them to our Portal.
How to Upload Your Documents
1. Log back into your account on https://apply.creditenable.com/
2. If you’ve already submitted the survey and have passed our eligibility check, you will be taken directly to the Documents Upload portal
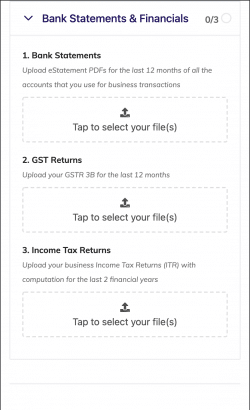
3. To upload your desired document, click on the “Tap to select your file(s)” option, find the folder where the required scans are stored, and selected the appropriate documents. (see Fig. 1).
4. Once the documents start uploading to the portal, the file will turn grey, and the screen will say “Uploading” next to the file (see Fig. 2)
 |
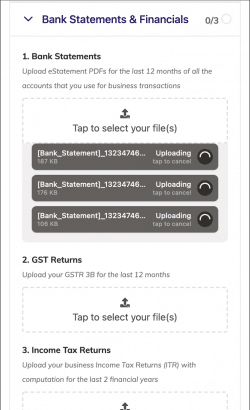 |
| Fig. 1. Document upload screen | Fig. 2. Document upload in progress |
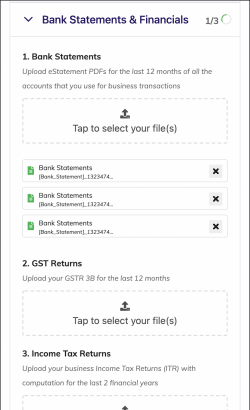
5. Fully uploaded files turn white, and an ‘x’ will appear next to them in case you want to remove a particular file (see Fig. 3).
6. Once all your documents are uploaded, we will check your documents, and one of our Customer Success Associates will be in touch in case we need additional documents from you (see Fig. 4).
 |
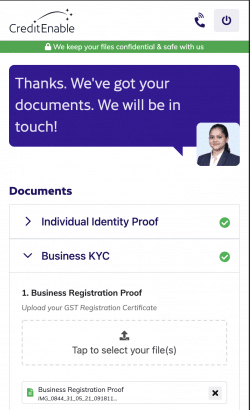 |
| Fig. 3. View documents uploaded | Fig. 4. Successful documents upload |
7. If no more documents are required, your full application package will be assessed by our matching algorithm, and you will be matched with a lender and a business loan product that meets your business needs. This matching can take up to one business day.
8. If a successful match is found, you will be alerted of the match, and we will support you through the loan disbursal process.
At CreditEnable, we are committed to helping SMEs access affordable finance easily and digitally. That is why we have simplified the application process, and we do all the heavy lifting on your behalf so that you can focus on what’s important – running your business.
Log back in and complete your application today!
Zero Hassle. Zero Fees.
Business Loans. Enabled Simply.
