Your Aadhaar card is one of the most important pieces of ID a resident of India has. The new myAadhaar portal by the UIDAI makes it easy for residents to update certain information online within minutes.
When applying for a business loan and other financial services, the lender will ask you for your Aadhaar card to verify your identity. The information on your Aadhaar card, like your address, must be updated to ensure you pass their verification and not rejected service.
It is advisable to always have your Aadhaar on your person in physical or electronic form in case you need to use it and ensure the information on it is up to date. Here are step-by-step instructions you can follow to update Aadhaar information online, using the myAadhaar portal, in just a few minutes.
What is an Aadhaar ID?
Your Aadhaar is a 12-digit numerical ID issued by the Unique Identification Authority of India (UIDAI). All residents of India must have this ID to access central and state-level government benefits, use banking and insurance services, and apply for business loans. Your Aadhaar number is linked to your PAN, bank accounts, income tax, GST, utility bills, ration account, etc.
Through your Aadhaar number, a service provider can digitally authenticate your demographic and biometric information to verify your identity.
You can either use your physical Aadhaar card to access services or use its digital version, your e-Aadhaar. However you prefer to carry your Aadhaar, remember to keep it safe and not share your Aadhaar number with strangers.
Learn how to download your e-Aadhar.
What are the steps to update my demographic Aadhaar information online?
Through the updated myAadhaar portal, updating your basic demographic information online has become simple and hassle-free.
Though the portal makes it easier to update your Aadhaar information online and track requests, there is a limit to the types and number f updates you can make. You are currently allowed to make edits to your name (minor edits), address, date of birth (DoB), gender, and language. To make updates to your email ID and biometric data, you must visit an Aadhaar Enrolment Centre in person.
The UIDAI charges a resident of India Rs. 50 (inclusive of all taxes) to update their Aadhaar information.
Follow the steps below to update your basic demographic Aadhaar information online:
Step 1: Have your Aadhaar number or your enrolment ID handy. You will need these to log in to your Aadhaar account.
Step 2: Go to the myAadhaar website and click on “Login”.
Step 3: Enter your Aadhaar number and CAPTCHA code. Now click on “Send OTP”.
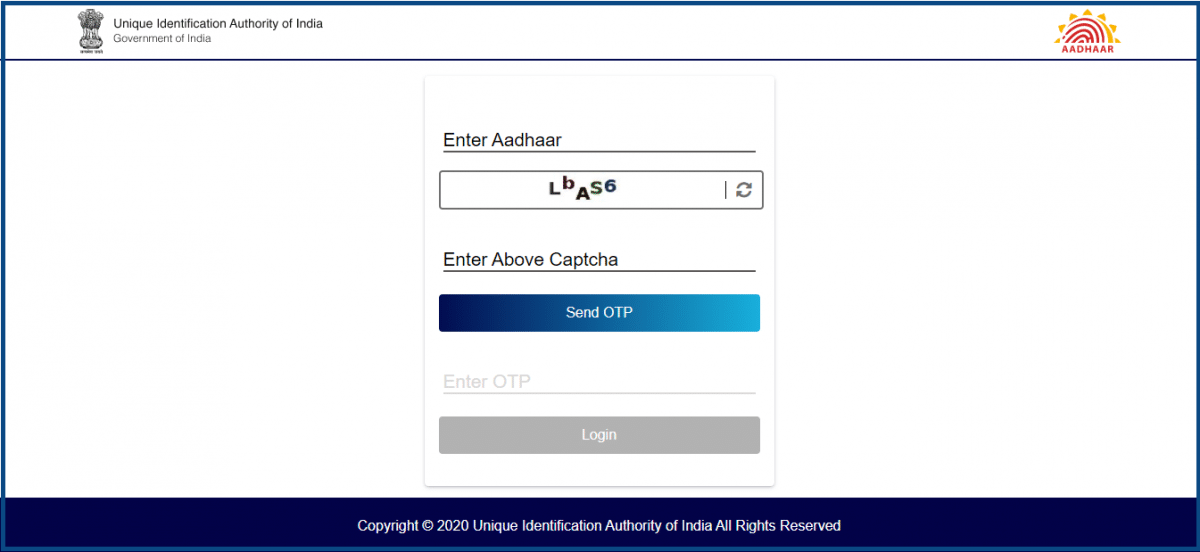
Step 4: A One Time Password (OTP) will be sent to the mobile number registered with your Aadhaar. Enter it in the “Enter OTP” section and click on “Login”.
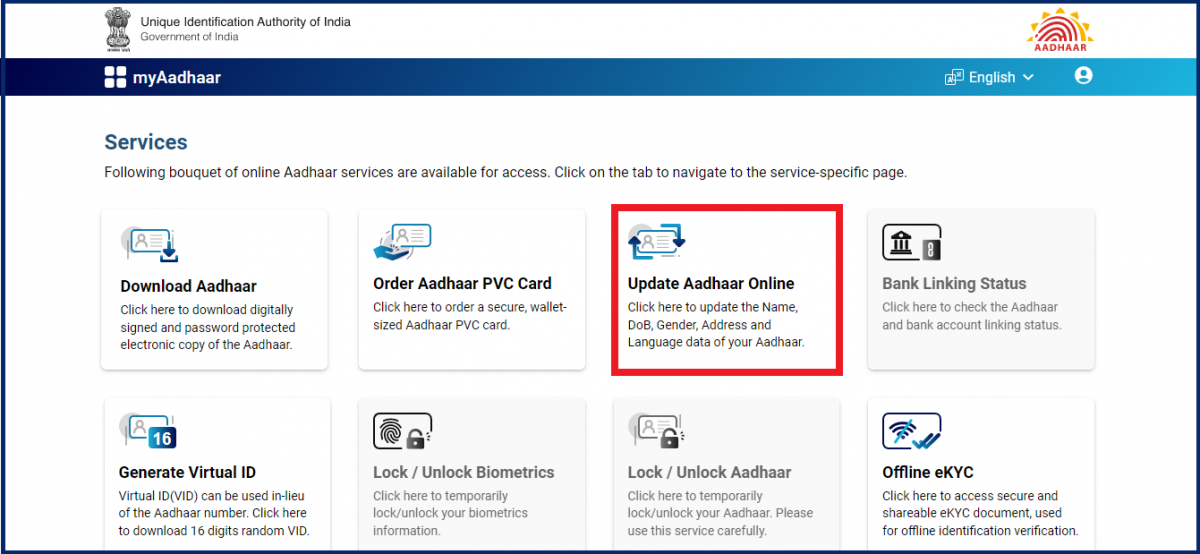
Step 5: You will now be redirected to the myAadhaar “Services” dashboard. Click on the “Update Aadhaar online” option.
Step 6: On the next page, you will be given a breakdown of the process to update your information. Please read these instructions carefully to avoid making any errors.
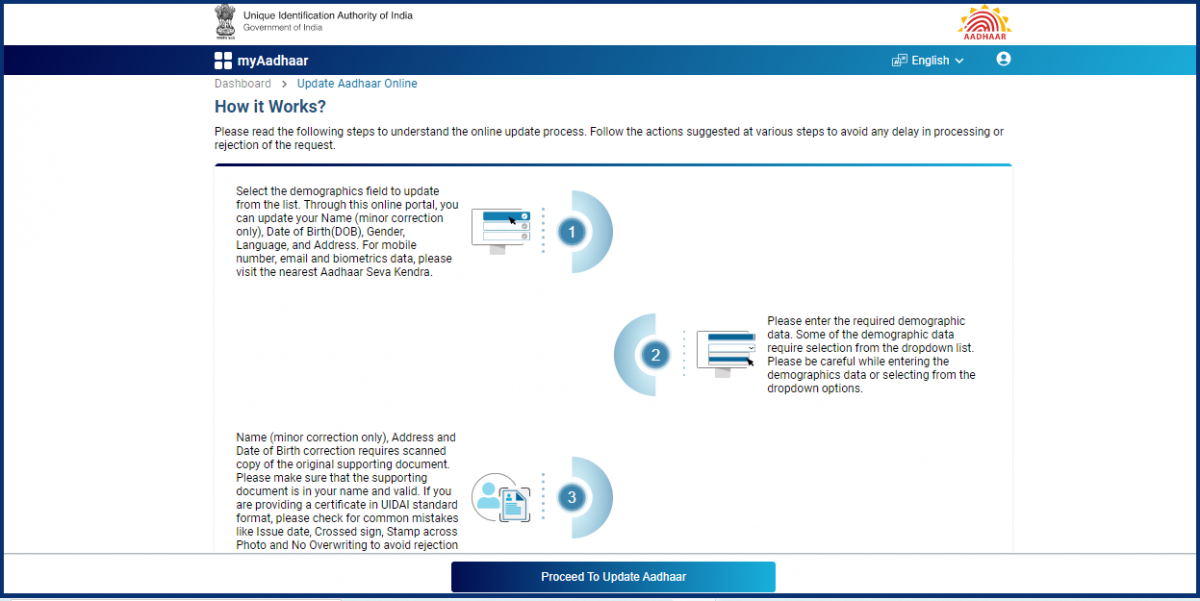
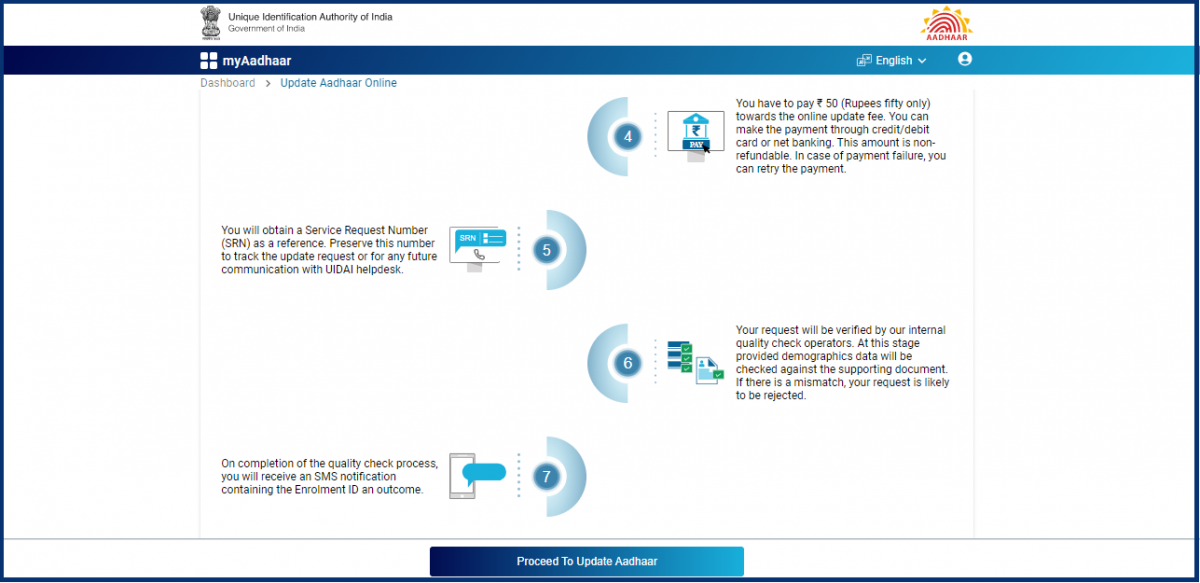
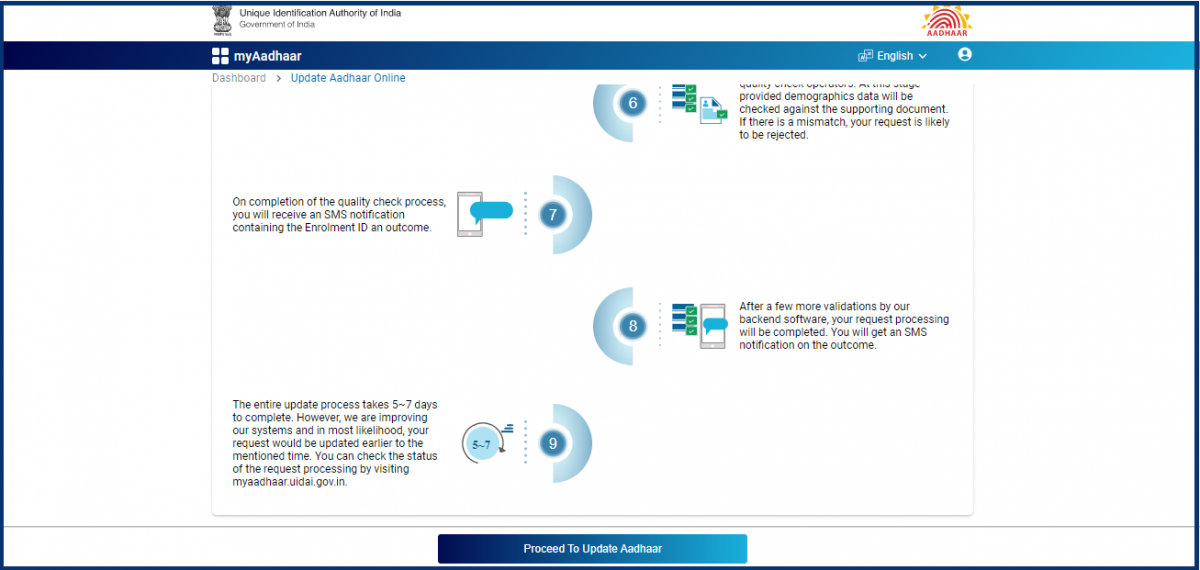
Step 7: After reading the instructions click on the “Proceed to Update Aadhaar” option at the bottom of the screen.
CreditEnable Tip:
You must upload a scan of an original supporting document to validate the information you are updating (like name, DoB, address, etc.). Remember to have this scan ready beforehand, and ensure the document is valid and free from errors like the Date of Issue, stamp across the photo, overwriting, etc.
Step 8: You will be redirected to a screen where you can select the information you wish to update. Here, you can also see the number of updates you have available for each demographic data point.
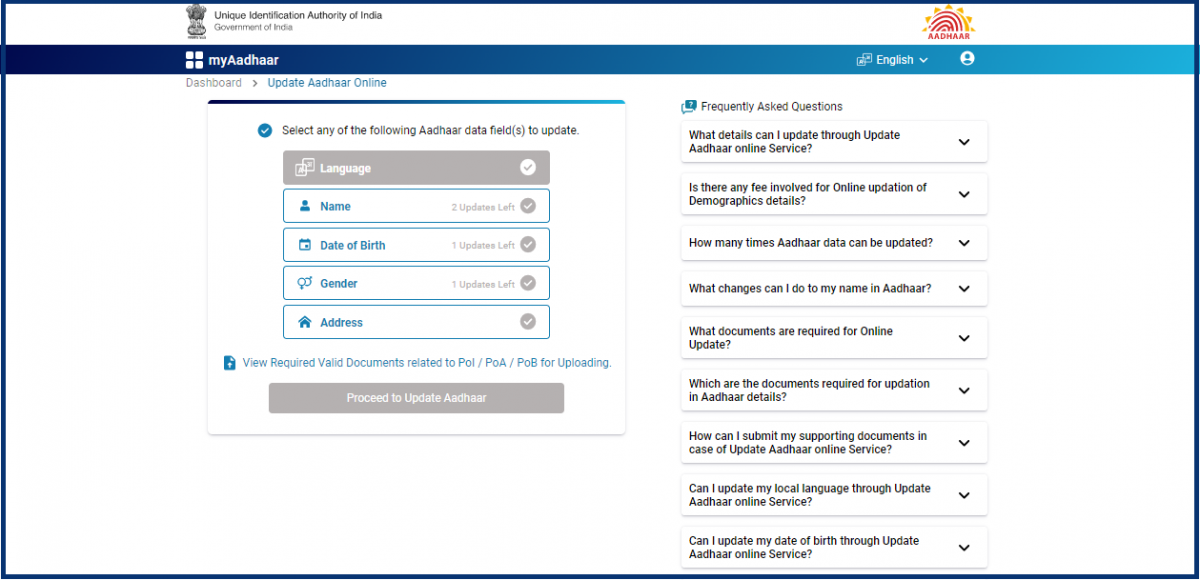
Step 9: Select the information you want to update, and then click on the “Proceed to Update Aadhaar” option.
Note: For this instruction manual, we will be updating our Address.
CreditEnable Tip:
Updating your Aadhaar information costs Rs. 50/- (inclusive of all taxes). Once you’ve entered and previewed the updated information, you will be taken to a payment portal to make the payment and successfully submit your updated information for verification.
Step 10: On the next screen, you will be shown your Current Address Details as they are on your Aadhaar card right now. Scrolling down, you can enter your new address in the “Details to be Updated” section.
Step 11: Once you’ve entered your updated address, you need to upload a scan of an original supporting document for the authorities to verify your updated information. When you click on the “Valid Supporting Document Type” option, a drop-down menu will appear showing you a list of all document types you can use as a valid proof to support your new address.
Step 12: Now click on “View Details & Upload Document” option and a pop-up box will open to help you find and upload your document from your computer. Select the file you want and click on “Upload”.
CreditEnable Tip:
For your document to be successfully uploaded, the bar at the bottom of your screen should turn green and read “100%”.
Step 13: Now click on “Next”.
Step 14: You will now be redirected to the Preview page where you can review all the information you are updating and the supporting document you have uploaded. Read through and ensure the information is correct, and if there are still edits to be made, click on the “Edit” icon on the right to make the corrections.
Step 15: After reviewing your new information, read and select the two condition boxes and click on “Next”.
Step 16: You now enter the Payment section of the update where you must pay Rs. 50/- to successfully submit the update for verification. Read and check the condition box, and then click on the “Make Payment” option at the bottom of your screen. You can use the Card (Debit and Credit), Net Banking, Wallet, and Paytm to make this payment.
Step 17: Once your transaction has been successfully completed, you will be redirected to an acknowledgement page where the status of your payment will say “Success” in green, and you are given a Service Request Number (SRN) that you can use to track the progress on your request.
Following payment, an internal quality check operator will verify your updated information against the supporting document you uploaded, and you will be sent an SMS will an enrolment ID and status. After multiple rounds of checks, you will be notified of the outcome of your request via SMS. If there is no mismatch, your request will be approved.
According to the myAadhaar portal, the entire update process takes 5-7 working days, and you can track the progress of your request on the myAadhaar portal.
Why must my Aadhaar have updated/correct information when applying for a business loan?
When you apply for a business loan, the lender must verify all the information you share with them, including your identity, business ownership, permanent place of residence, and your financial history. Some of this information they can verify from the other supporting documents you submit with your loan application. Your demographic and biometric information they verify using your Aadhaar number.
Your Aadhaar is linked to your PAN, and your PAN is linked to your bank accounts, tax accounts, and credit bureau reports. So, using your Aadhaar, lenders can develop a 360° understanding of you and your business financials and then make their final lending decision.
If there are errors on your Aadhaar, or if the information on your Aadhaar does not match your information on the other documents you submitted, the lender will reject your request for a business loan.
So, the quickest way to get your loan approved and disbursed is to have all your paperwork up-to-date, error-free, and ready when you submit your business loan application.
If your required supporting documents are in order start your loan application on CreditEnable’s technology platform today!
Business Loans. Enabled Simply.
